How to recover data from NAS Device
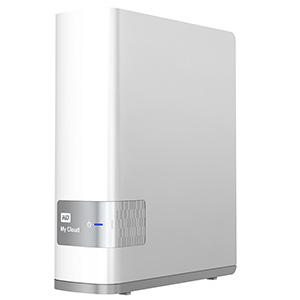
Running out of space is common nowadays, and Network Attached Storage(NAS) is a great solution. You don't have to be an engineer or IT geek or having a big box of screwdrivers and wrenches to expand your home network capabilities. Just plug-in NAS into free port at your home's router, switch or USB port on your PC and it's ready to use. These devices can expand available storage space up to 32 Tb without any effort.
There are some drawbacks too. Naturally, having an extra 32 Tb of space is luxurious but loosing 32 Tb of your data, your home photos for example is a real headache. Effortless install and feature “visible everywhere” can be frustrating as these also makes NAS and your precious data on it vulnerable to virus and neighbour-infant-hacker attack, power issue, kid's play, ex-'s revenge or even more system failures that can occur on any device present at your network. Short list of potential suspects nowadays consists of all your home's PCs, laptops, tablets and smartphones. No wonder we receive a lot of support requests pertinent to NAS devices.
So we decided to make a decent guide to help you at this process.
Basic steps to recover data from any NAS device would be:
- Determining if your NAS use RAID inside or not.
- Plugging your NAS diks directly to your PC
- Choosing right SoftAmbulance's product that suits your need.
- Performing recovery as usual
Let's see more into each step.
Determining NAS internal storage type
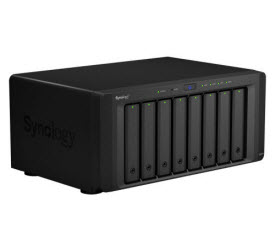
NAS differs from simple case with SATA-USB connector. It has a full-fledged PC system inside usually running under Linux OS. This offers smart configuration, a number of features and variety of the supported network protocols to access data. Majority of NAS devices use software or hardware RAID controllers and several HDD or SDD installed to gain all possible from the disks. NAS based on RAID is a subject to recover using separate data recovery tool like RAID Recovery, except one exclusion: RAID 1 also known as Mirror set of disks, stores data practically same way as standard HDD does, so it's data can be recovered with a simple Uneraser. Although this RAID type is seldom seen in NAS.
All other NAS devices that don't use RAIDs or have single disk can be recovered with SoftAmbulance Uneraser, Partition Doctor or Photo Undelete.
Plug in NAS disks to your PC
Another annoying problem in the world of data recovery: You can not get low level disk access through network. There are couple of roundabouts but none of them suits NAS recovery case. Plugging NAS to USB port also not an option as built-in Linux still prevents low level access, plus there are issues with USB ports by themselves, therefore we're forced always ask our customers to plug in their disk directly to motherboard using SATA or eSATA(if you plug to notebook) ports. So you'll have to get your favorite Philips screwdriver and get your hands dirty.
Choosing the right software
All SoftAmbulance products feature full support of Linux file systems including Linux RAID levels 0, 1, 4, 5 and 6.
- If your NAS has no RAID and a single disk inside there are few options:
- Plugged disk is visible at Explorer and you can access the data. Use Uneraser to perform general data recovery such as recovery of accidentally lost files or folders. Photo Undelete if most of the lost data images. Also highly recommended in RAW recovery case. Office Recovery and it's smaller siblings Word Recovery, Excel Recovery, Access Recovery for corresponding cases. MySQL Recovery and MSSQL Recovery to get back deleted or corrupted databases from your NAS. All these tools are at least expensive from our product range and offer great value for money. They suit perfectly for common data recovery cases.
- Plugged disk is not available to access from Explorer, but shown in Disk Management that is located at Control Panel → System and Security → Administrative Tools, click on Storage and select Disk Management. You need Partition Doctor. It will do all Uneraser can do, plus it can scan raw disk and reconstruct file system.
- If your NAS is based on RAID the only option is to use RAID Recovery. RAID controller splits data across several disks and RAID Recovery is the only product that can sort all these pieces right. Especially if native RAID controller fails and\or disks lost their metadata. RAID Recovery detects type and reconstructs RAID configuration automatically, which is important, as there are variety of different NAS systems available, often with undocumented RAID type.

Performing recovery
Please make sure you have not skipped any previous step, as all of them are vital for successful recovery. Run installed tool and select your NAS disk from the list to scan. If you use RAID Recovery, you will need to run RAID Reconstruction wizard, select all disks from NAS and combine them into new RAID before scanning for required data.
Just follow the Recovery wizard guide, wait until it's ready, it probably will take hours if not days until it's done. Select recovered data and save it to some other-then-NAS disk.
Congratulations! You have your data back!